

Description:
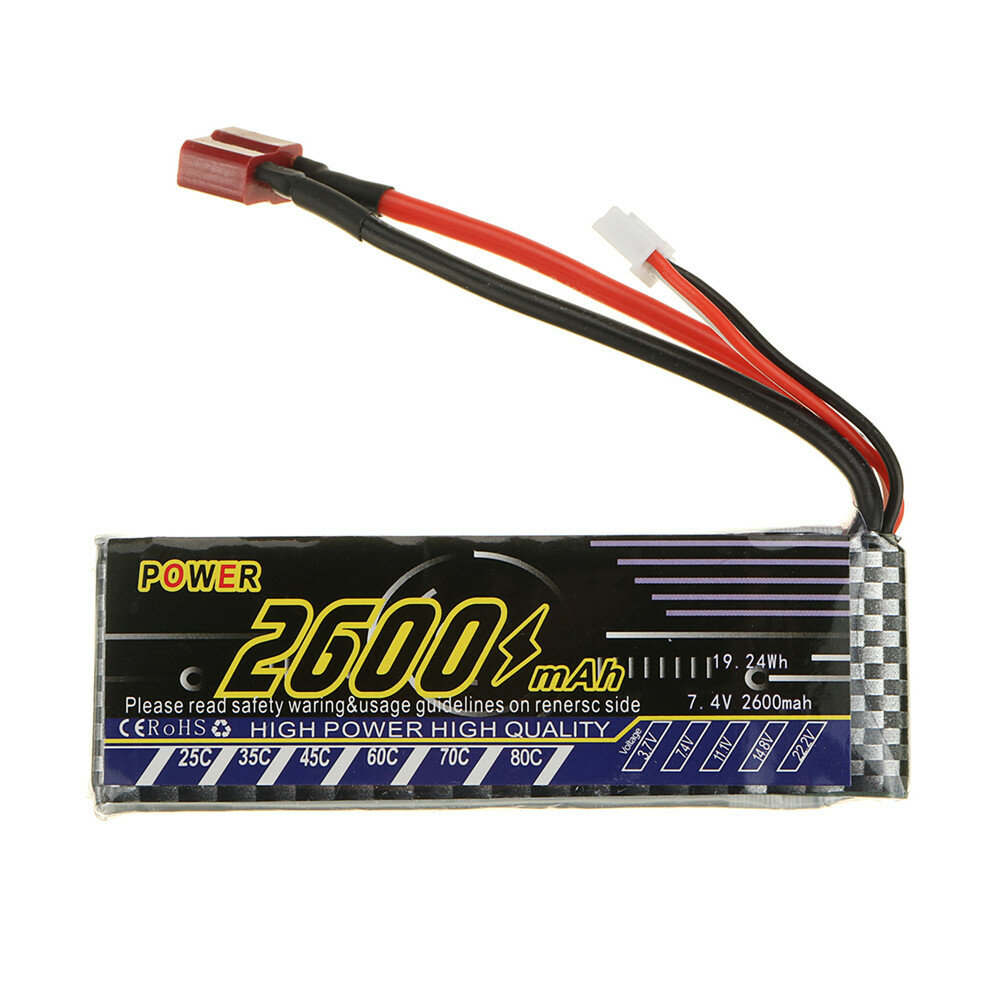
Item Name:Lipo battery
Material:Metal
Color:As picture shown
Product Size:About 10*3.2*1.8cm
Product Weight:Approx.127.8g
Compatible Model:Wltoys 144001 124016 124017 124018 124019 1/12 1/14 rc cars vehicles models
Specification:
Voltage:7.4V 2S
Capacity:2600mAh
Discharge Rate:25C
Plug Type:T plug
Required Charging Time:About 2-3 hours
Support Playing Time:Around 10-15 minutes(fully powered)
Package Included:
1X Lipo Battery 7.4V 2600mAh


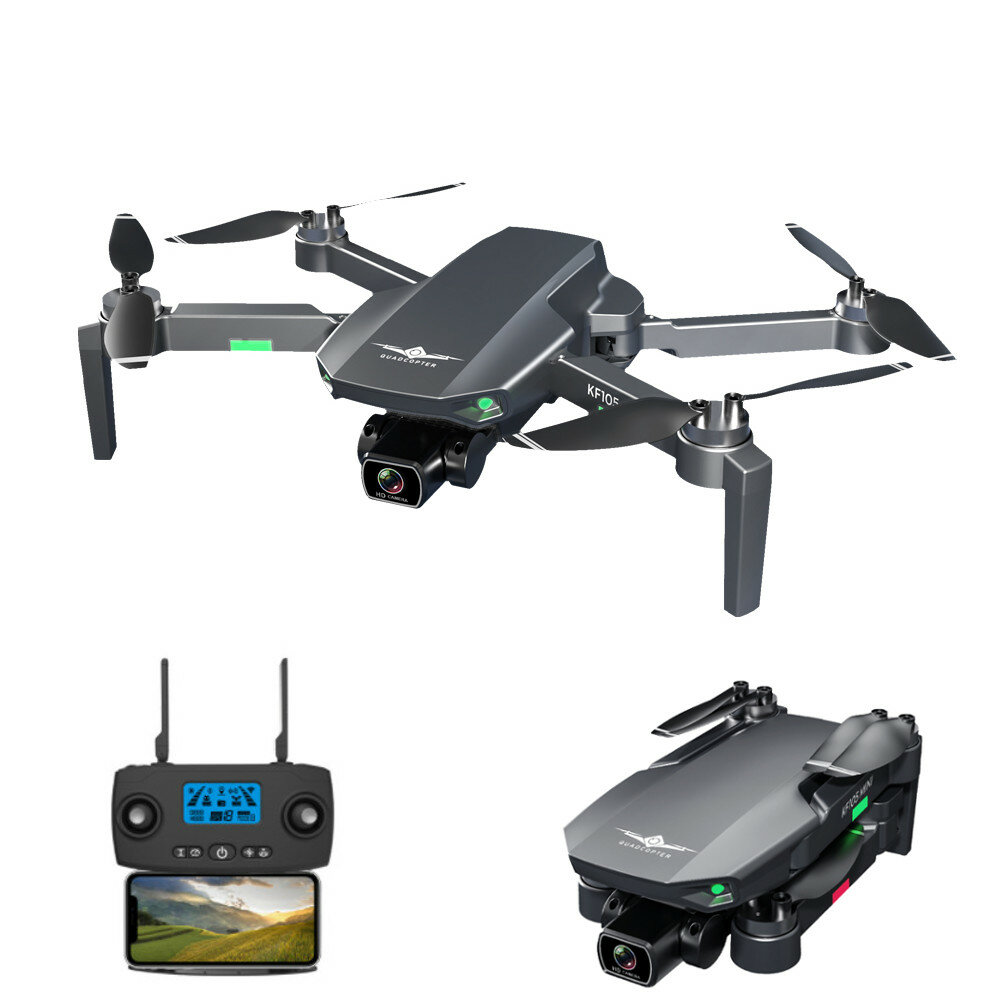
KF KF105 GPS 5G WiFi FPV with 4K HD ESC Dual Camera Visual Obstacle Avoidance Brushless Foldable RC Drone Quadcopter RTF
Specification:
Brand Name: KF
Item NO: KF105
Color: Black
Motor: Brushless Motor
Quadcopter Battery: 7.4V 2200mAH LiPo Battery
Flying Time: About 22 minutes
Charging Time: About 5 hours
Remote Control Distance: Approx. 500M (no interference)
FPV: 5G WiFi
Image Transmission Distance: Approx. 300M (no interference)
Camera Resolution: 4K (Adjustable camera by transmitter, 90°)
Obstacle Avoidance System: Visual Obstacle Avoidance
Maximum Wind Resistance: Level 4
Quadcopter Size: 145 x 80 x 60mm (Foldable)
270 x 260 x 60mm (Unfoldable)
Storage Bag Size: 260 x 185 x 85mm
Features:
- Folding arm, small size, easy to carry.
- Built-in 4K HD dual wide angle camera give wide range high denfinition pictures and video.
- With 5G wifi function can be connected APP, APK system to take pictures, video, real-time transmission through the phone camera image.
- GPS accurate positioning + Optical Flow hovering.
- With 2200mAh large capacity battery, the flying time up to 22mins.
- Draw a flight path on the screen, the drone will fly autonomously along the specified path.
- Way-point Flight: Plan your flying route by drawing the dots on the built-in map on the App, recording beautiful scenery along the route. Besides, the GPS mode will give you the exact positioning details of the drone.
- Point of Interest: Select a building or location and click it on the map of App. The drone could continue to fly clockwise around this specific building or location, presenting a comprehensive image.
- Return to Home: It will always returns automatically whenever Battery is low, Signal is lost or You press one key return.
- 2.4GHz anti-interference technology.
- 4 channels for ascent, descent, forward, backward, left flight, right flight and 360°roll.
- Six-axis gyroscope, smoother flight and more convenient control.
- LED lights make flying more spectacular, especially in the dark.
Function: up / down, front / back, left / right turn, lateral flight, three-level flight speed, LED light, GPS positioning, around flight, waypoint flight, altitude hold mode, headless mode, one key return, one key take off and landing, WiFi FPV, camera / video, Visual Obstacle Avoidance
Package Included:
1 x KF105 RC Quadcopter
1 x Remote Controller
1 x 7.4V 2200mAh Battery
1 x USB Charging Cable
4 x Spare Blade
1 x Screwdriver
8 x Screw
1 x User Manual
1 x Storage Bag


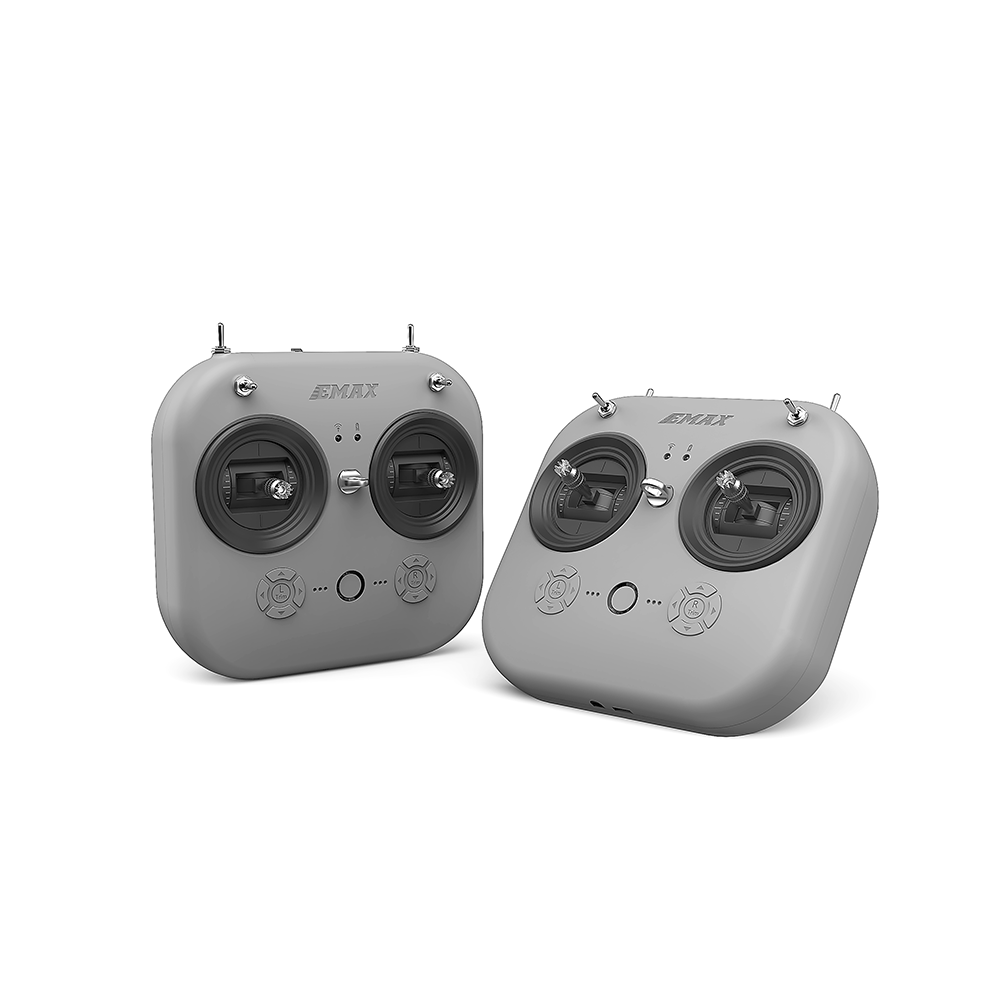
EMAX E8 2.4GHz 8CH Dual-frequency Left Right Switch Mode2 Radio Transmitter Built-in USB Charge Wired Trainer Interface for EMAX Tinyhawk III RC Drone
OVERVIEW:
E8 Transmitter is a new wireless controller released by EMAX.It has a built-in 2.4GHz dual-bandantenna and 2.4GHz RF module.The RF module supports 8 channels.The channel range is configurable and compatible with most receivers on the market.It is equipped with a wired trainer interface and simulation.The Mode of the device can switch between left and right hand modes,and the ergonomic design can bring a good user experience paired to gether with a built in battery which can be charged via USB.
Specification: (Manual)
Brand Name: EMAX
Item Name: E8 Radio Transmitter
Model: E8
Weight: 260g (without battery)
Size: L*W*H=150x140x45mm
Working voltage: 3.7V-4.2V
Channel: 8 channels, all channels can be configured
External interface: Micro USB interface, 3.5mm audio interface (wired trainer interface)
Transmitting module: built-in 2.4GHz dual-frequency FPC antenna, 2.4GHz RF transmitting module
Working frequency band: 2.4GHz (2400MHz-2483.5MHz)
Maximum output power: 22dbm
Charging system: Built-in USB 5V--1A linear lithium-ion battery charging system
Mode switching:
D8 mode: press the power switch and the "L1+" button at the same time: turn on and enter
D8 mode, then the mode indicator will turn solid red.
D16 mode: press the power switch and the "L2-" button at the same time: turn on and
enter D16 mode, then the mode indicator light will turn solid green.
D16 LBT mode: Press the power switch and the "L4+" button at the same time: Turn on the
controller and enter D16 LBT mode, then the mode indicator light will turn solid yellow
Battery & Charging:
The E8 Transmitter is compatible with a 18650 battery, with a working voltage of 4.3V-3.3V.
When you need to reinstall the battery, remove the battery compartment cover and install the battery according to the correct polarity (the negative pole is on the spring side of the battery compartment). Confirm that the battery compartment cover and the battery compartment are perfectly matched then push forward until locked. If the battery is not installed correctly, charging and starting cannot be performed correctly.
The remote control is charged with the micro USB at the bottom.
Charging system and battery installation instructions:
Power charging indicator status:
When Red LED is solid: charging is in progress.
When Green LED is solid: charging is finished.
Note: Use a 5V-1A adapter to charge. When the voltage is low, it will alarm. Please recharge when low.
Gimbal Trim:
Each joystick has a corresponding Trim button. Each Trim button adjusts the direction of the corresponding joystick control. Each time it is adjusted, a beep will sound. When it is adjusted to the center position, it will make a longer beep. Please pay attention to the
sound. With joysticks centered, use the Trim buttons until the drone is steadily hovering in place.
Calibration of joystick:
The E8 Transmitter is pre-calibrated, but recalibration can help solve some common issues:
1. With the E8 Transmitter turned off, press the "L3-" button and the power button at the same time as the controller turns on.
2. Wait for the center indicator to light up and change from fast flashing to slow flashing, and push the joysticks of E8 Transmitter to the maximum travel in the four directions up, down, left, and right.
3. Press the "L3-" button, the prompt will sound, exit the calibration mode, and the E8 Transmitter will then boot up.
Regarding the Mode change and switching between left and right hand operation instructions.
Package Included:
1 x E8 Radio Transmitter


We present Woop a creative magazine templates for bloggers who love to blog on food, fashion, travel and for personal blog.
Enter your email address below to subscribe to our newsletter.